本文搭建硬件环境
1.windows10系统
java环境配置
用eclipse建立项目
- 下载Eclipse for RCP and RAP Developers:https://eclipse.org/downloads/packages/eclipse-rcp-and-rap-developers/lunasr2
maven安装:
下载地址:http://maven.apache.org/download.cgi(下载apache-maven-3.5.0-bin.zip文件)
新建环境变量MAVEN_HOME:F:\maven\apache-maven-3.5.0(maven所在路径)
在PATH里加入maven的bin的路径:%MAVEN_HOME%\bin
运行mvn -v检验是否配置成功

配置 F:\maven\apache-maven-3.5.0\conf文件夹下的 setting.xml 配置文件:
找到localRepository标签,将其修改为:
将setting.xml文件copy到F:/maven/repository文件夹下。
eclipse下选择“ Window -> Preferences -> Maven -> User settings”
修改你的settings.xml文件位置:

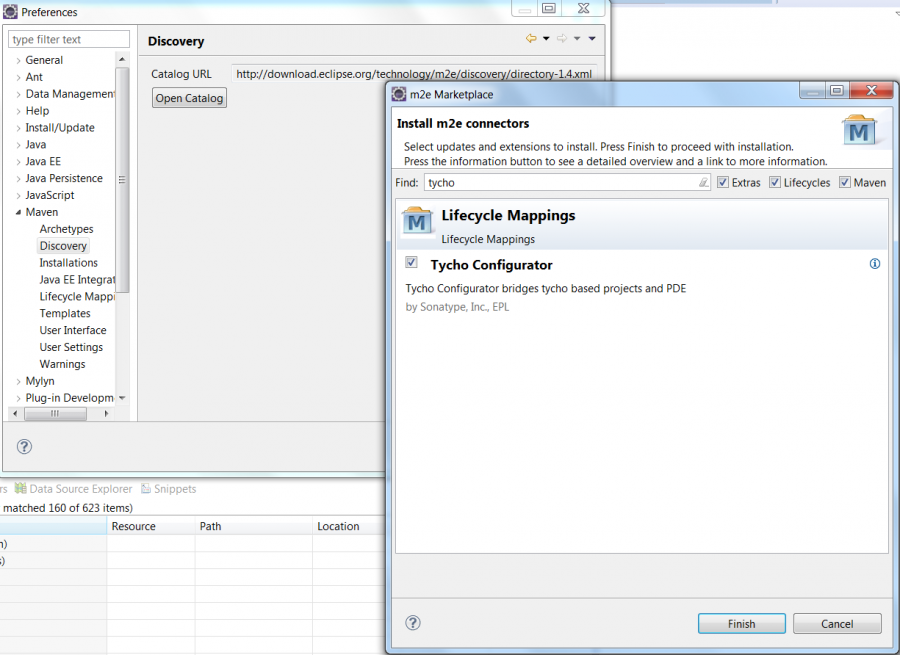
3.安装Tycho插件
Click Window -> Preferences -> maven -> discovery -> open catalog and type Tycho. Check the “Tycho Configurator” checkbox.
4.Clone OM2M using Eclipse
- Select Window->Show View -> Other->git
- 到eclipse左下角窗口上选择“Clone a Git repository”,
- Clone the OM2M project using the following link: http://git.eclipse.org/gitroot/om2m/org.eclipse.om2m.git. In the first page, enter the mentioned link in the URI’s location field. 点击NEXT

选中master,再点击next

选中“import all existing projects after clone finishes”,点击finish。等待clone完。
5.Build OM2M using Eclipse
在左上角的“package explorer”窗口的“org.eclipse.om2m”文件包上右键选择“Run as -> maven install”

等待build完期间要等待很长一段时间(半下午),会自动下载很多包。最后success图如下:

OM2M测试
1.到文件夹”org.eclipse.om2m/org.eclipse.om2m.site.in-cse/target/products/in-cse/..“一直往下找,找到”start.bat“,双击该文件,会显示下面界面:

2.然后输入ss会进入OSGi console,输入exit关闭。

3.在浏览器输入网址:http://127.0.0.1:8080/webpage 访问IN-CSE Web界面。
用户名“admin”和密码“admin”,然后点击登录按钮显示IN-CSE资源树。
